
Artificial Intelligence has made remarkable progress since its inception, and ChatGPT has played a significant role in its growth on the internet. However, AI is not limited to text. You may have come across a service called Midjourney, which creates full-scale AI images from text inputs. If you find it challenging to use, don’t worry. We’ve put together a comprehensive guide on how to easily create AI art using Midjourney. So, turn on your PC and open Discord, as we guide you through the process.
Requirements to Fulfill Prior to Using Midjourney
Before we start creating AI art on Midjourney, there are a few prerequisites that you need to have in place. Ensure that you have met all of them before proceeding.
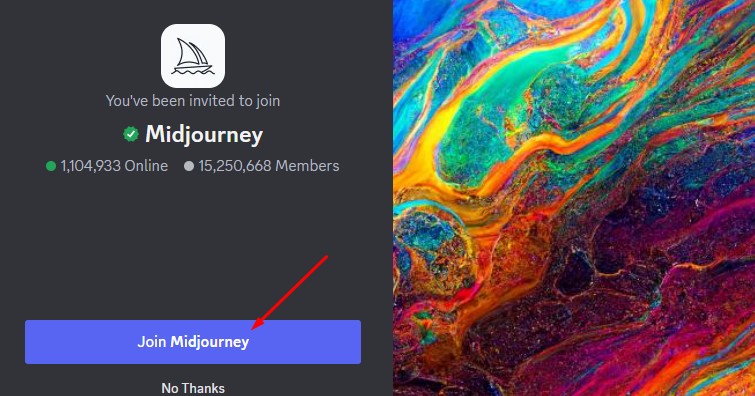
- Discord Server for Midjourney- Currently, the Midjourney project operates solely through Discord. Therefore, to begin the process of creating AI images, you must join its server. While it’s not too difficult, we have provided a dedicated guide below to assist you in joining the server.

- Midjourney Subscription for a Fee- At one point, Midjourney used to provide free trials for up to 25 images. However, due to the overwhelming demand on their servers from various viral AI-generated images, such as the Pope wearing a puffer jacket and Trump being arrested, Midjourney has stopped offering free trials. Currently, a paid subscription is required to access their services.

To start creating AI art with Midjourney, it’s necessary to purchase a paid plan. We have created a comprehensive guide that covers both the requirement of joining the Discord server and acquiring a Midjourney subscription. You can learn how to buy a Midjourney subscription here.
Guide to Creating AI Art using Midjourney
With these fundamental requirements out of the way, it’s time to start creating stunning AI art using Midjourney. Follow the steps below to do so:
- To get started, navigate to any of the “newbies” text channels in the Midjourney server, and enter “/imagine” in the message box.

- Next, type in the detailed text prompt for the AI image you want to create using Midjourney. It’s crucial to be as specific as possible in your input for optimal output. Midjourney needs to understand every aspect of your prompt to generate the desired AI art. You can separate each word or phrase with a comma for greater specificity. After entering the prompt, hit the Enter key to continue.

- Within seconds, Midjourney will start generating the AI art based on your input, and you can watch the progress in real time as the images become more refined. In just a couple of minutes, Midjourney will complete your chosen AI art with four different variations. Additionally, you will notice some buttons labelled U and V located beneath the images. These are customization options that we will explain further below.


- As demonstrated above, creating gorgeous AI art using Midjourney is an incredibly straightforward process. You can repeat the same steps with as many prompts as you like. By default, Midjourney employs the V4 engine for image generation, but the newest V5 engine has been released, which features several noteworthy enhancements.

- The latest version of Midjourney, V5, includes a variety of improvements such as the ability to draw fingers more accurately, enhanced color and detail profiles, and many other features. To upgrade to the newest version, check out our dedicated guide on how to enable Midjourney V5, and then return here to explore the additional options.
Explore the various customization options available with Midjourney
Although Midjourney creates high-quality images by default, you can further enhance the output by exploring various customization options. These options allow you to fine-tune the generated images to meet your specific requirements and preferences. Let’s discuss them right here:
- Upscaling and Redo Options- You might have noticed four buttons labelled as “U1, U2, U3 & U4” under the generated images. These are upscaling options that Midjourney provides to improve the resolution and quality of the image.

Each number in the U buttons corresponds to the image in the grid. Selecting a button upscales the corresponding image and adds more details to improve its resolution. The final output is a significant improvement over the default image. Additionally, the 🔄 (re-roll) button allows you to re-run the image creation job to get a new grid of images.


Furthermore, while Midjourney’s default upscaling algorithm already improves details and generates a larger image, you can achieve even better results by using additional upscaling options. Which are:
- Make Variations: Midjourney generates new variations of the upscaled image in a newly created grid model.
- Web: This button opens the generated image in the user’s Midjourney gallery.
- Light/Beta Upscale Redo: This button performs upscaling using different upscaling models, which can result in varied improvements in image quality and resolution.
- Remaster: The “Blend” option appears when you use the Beta upscale option and it combines the composition of the original image with the details of the new one by using test and creative parameters for upscaling.
- Favorite: This button allows you to add the current image to your list of favorite images on Midjourney.

Midjourney offers several image models such as Detail, Light, Anime, Max, and more. Each model supports different resolution sizes, and as such, it may take longer to upscale images. However, the default upscale buttons still provide good final output.

- Aspect Ratio- Midjourney enables users to adjust the aspect ratio of their generated image. The aspect ratio is the proportion between the width and height of an image, expressed as a ratio (e.g., 2:3). By default, Midjourney creates images with a square aspect ratio of 1:1, where the width and height are equal. However, users can change the aspect ratio by including a command in their prompt input. To change the aspect ratio of your image, you can use the “–ar” parameter at the end of your text prompt. Different Midjourney models have different maximum aspect ratio options. For instance, Midjourney V3 supports aspect ratios of 5:2 to 2:5, while the V4 model has AR options of 1:2 to 2:1. For example if you want to change the aspect ratio of your image to 7:4, you can add the “–ar” parameter at the end of your text prompt. Here’s an example: “/imagine prompt car on the highway –ar 7:4”.

Some of the common aspect ratios in Midjourney options are as follows:
- –aspect 1:1 – Default aspect ratio.
- –aspect 5:4 Common frame and print ratio.
- –aspect 3:2 Common in print photography.
- –aspect 7:4 Close to HD TV screens and smartphone screens.
To change the aspect ratio of your generated image in Midjourney, you can use either the “–ar (value)” command or the “–aspect (value)” command. Both commands achieve the same result. These commands should be added at the end of your text prompt. For example, if you want to change the aspect ratio to 7:4 for an image of a car on the highway, you can enter the following command: “/imagine car on the highway –ar 7:4” or “/imagine a car on the highway –aspect 7:4”.
- Image Variations- Midjourney doesn’t just limit the variations of your prompt to the four options provided. For those who want even more variety, the AI art generator offers additional variation options. You can use the “V1, V2, V3, and V4” buttons to create subtle variations of the selected image.

When using the “V1, V2, V3, and V4” variation buttons in Midjourney, the AI art generator creates a new image grid with slight variations of the chosen image. This process generates an entirely new image grid that has a similar overall style and composition to the original image. Despite this, the output variation is still of excellent quality, just like the original image.


If you’re not satisfied with the default image options, Midjourney provides an excellent variation feature that allows you to create slight variations of the chosen image. The variation buttons, “V1, V2, V3, and V4,” give you more variety, and Midjourney generates an entirely new image grid with similar style and composition to the original image. You can mix and match different images to create the perfect combination, making it perfect for those who want more options.
- Info Command- Keeping track of your remaining image generations or fast hours can be a daunting task, especially since using Midjourney requires a paid subscription plan. The Info command is a useful tool to keep track of your Midjourney profile stats. It provides detailed information about your subscription plan, visibility status, remaining fast hours, lifetime usage, and more. Additionally, there is a button that takes you to your feed, which is your official Midjourney profile. This feature is particularly handy for users who want to monitor their usage and track their account activity.

To access your Midjourney profile stats, you can use the Info command. Simply go to a newbie channel and type “/info” in the message box, then press Enter. This command will display your subscription tier, visibility, remaining fast hours, lifetime usage, and other information about your profile. It also includes a button that takes you to your feed, which is your official Midjourney profile. You can use this option to keep track of your stats and monitor them regularly.
- Fast and Relaxed Mode- Midjourney utilizes Graphics Processing Units (GPUs) for AI image generation by fully processing each text prompt. Users buy time on these GPUs when they purchase a Midjourney subscription. Midjourney’s Fast Mode is designed to generate images quickly but comes with a specific time limit. This limit is used whenever a user generates images on the default Basic plan or selects it on other plans. On Midjourney, there is also a Relaxed mode available for users. While Fast Mode has a time limit, Relaxed Mode offers unlimited image generations, but users have to wait in a queue behind others. Depending on the queue position, the wait time can vary. However, it’s worth noting that the Relaxed Mode is only available for users on the Standard and Pro plan, and not for those on the basic plan.

To change between the Fast and Relax modes in Midjourney, you can type “/settings” in the text box on the main server or in the bot’s DM and press Enter. This will bring up different settings, and you can click on either the Fast or Relax mode option to switch between the two.
To add Midjourney to your own Discord server
If you’re interested in adding the Midjourney AI image generator to your own Discord server, you’re in luck! It’s possible to do so for convenience and quick access. However, before proceeding, it’s essential to ensure that you already have a Discord server set up. If you don’t, you can learn how to create one before continuing with these steps.

- Go to the Midjourney website and log in to your account.
- On the dashboard, click on the “Add to Server” button.
- A new page will open with a list of servers you own or manage. Select the server you want to add Midjourney to and click on the “Authorize” button.
- You will then be redirected to Discord’s authorization page. Select the server you want to add Midjourney to and click “Authorize.”
- Midjourney will now be added to your server, and you can use it to generate AI art by typing prompts in the chat.
- Note that you need to have the appropriate permissions to add a bot to your server, and your server must be verified by Discord.
More Similar Articles of the Author
What is Color Psychology in Art and Design?
What is the start of Color Psychology?
How is Social Media Influenced by Colors?
Analyzing the Use of Contrast and Chiaroscuro by the Old Masters
The Importance of Color in Abstract Expressionism
What is the Significance of Primary Colors in Pop Art?
What is The Experience of Entering into the Digital Art World like?
What is the Relationship Between Impressionism and Pastels?
Viewing life in All Its Hues

 Content Writing
 Video Marketing
 Graphic Design
 Lead Magnet Creation
 Content Marketing